The semantic model designed in Pyramid is comprised of numerous settings and aspects. Chief amongst them is the relationships between the various tables in the underlying data model. Relationships, referred to as joins, are used to combine columns from two or more tables. These joins provide the modeling tools with instructions on how the tables and data sets fit together.
Join operations used in the Data Flow portion of the ETL are not the same thing as relationships. The joins that are defined in the Data Model component will not be added to the schema of the source database.
What are Relationships?
Your model is likely to contain a large number of tables, many of which are related in some way. End users will want to create queries that return related data from different tables.
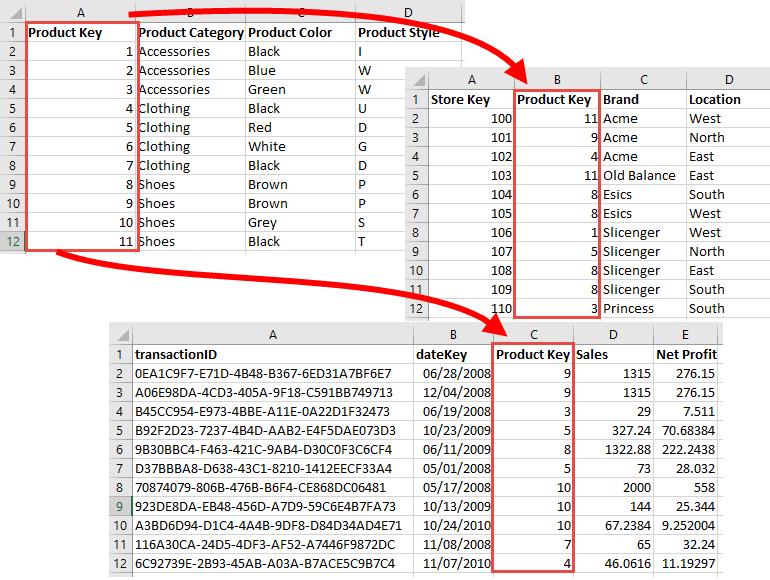
For example, a retail company may have a table that lists products, product color, and product style, another table that lists brands and store locations, and another table that lists sales and net profit.
Say you want to create a list showing sales by product and brand; each of these columns is stored in a different table. To create the required list, there must be a logical relationship (a join) defined between all three of these tables.
These relationships are usually created by a matching a primary key column in one table (the 'owner side' of the join) to an identical foreign key column in another table (the 'inverse side' of the join). For example, the primary key column in the Products table may be 'Product Key'. If this same column exists as a foreign key in the Brands table and the Facts table, we can use it to create a join from Products to Brands and from Products to Facts.
Schemas and different Relationship Designs
There are various approaches to designing the relationship schema for a data model, that is then reflected in the overall semantic model used by Pyramid. Supported schema designs can be split into 3 main types: star schemas, snowflake schemas and diamond schemas. Pyramid can support all 3 types. Each has its pros and cons, with the star schema being the most performant and appropriate for analytic use cases.
- Click here to read more about the different schema types.
Relationships Diagram
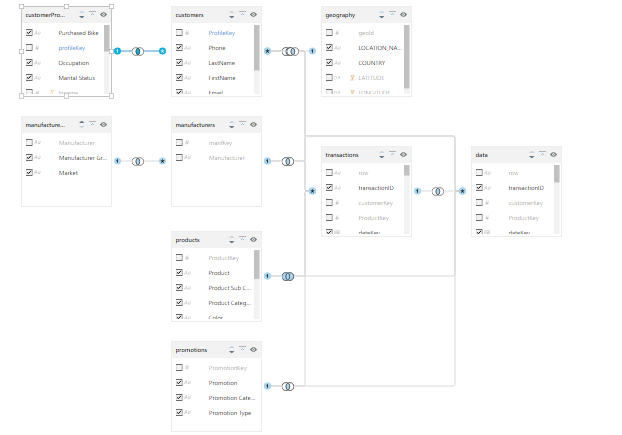
The relationship diagram displays all the tables in the data model, and the relationships between the tables. By default, Pyramid uses heuristics to define relationships according to each table's primary key column.
The direction of each join is indicated by the icons at each end of the join:
 : indicates that the join comes from this table; this is the primary table in the join, as it contains the primary key column.
 : indicates that the join goes to this table; this is the foreign table in the join, as it contains the foreign key column.
You'll notice that Pyramid automatically adds joins to the model; this is done via heuristic algorithms called 'auto-relationships'. The heuristic model can be changed (you can select from three algorithms) or disabled, and joins can be deleted, added, or edited as required.
- Click here to learn about the heuristic models used for defining auto-relationships.
- Click here to learn more about joins, including join types, and adding, editing, and deleting joins.
- Click here to learn about join key columns.
Navigating the Relationship Diagram
Each table in the model is displayed as a widget in the diagram. Each table widget lists the columns in that table. The relationships between the tables are represented by the lines connecting them.
From the ribbon, you can use the tools grouped under Diagram to rearrange the relationship diagram:
- Rearrange: if you've moved any tables around on the diagram, the Rearrange function will restore them to their original position on the canvas.
- Scale to Fit: scale the relationship diagram down to fit on the canvas.
- Expand All: expand all tables in the diagram.
- Collapse All: collapse all tables in the diagram.
- Connector Type: select the type of line that will connect joined tables. The default connector type is 'path', but you can change it to 'direct' (straight lines).
- Validate Joins: ensure that the joins are valid.
- Delete: delete the selected join.
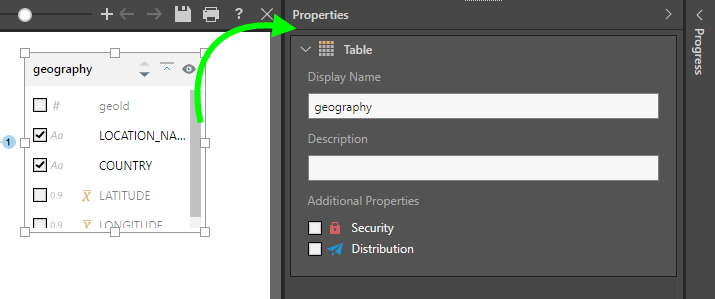
Table Properties
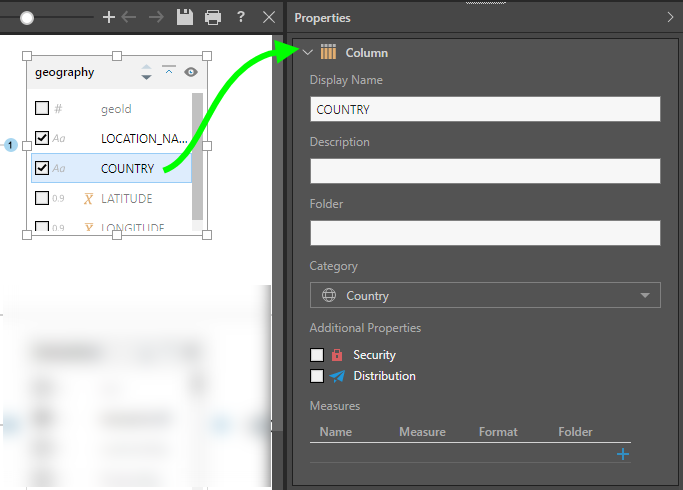
Click the widget's border to show its properties in the Properties panel (green arrow below).
- Click here to learn about table properties and editing table metadata.
Column Properties
Select a column (purple arrow below) to show its properties in the Properties panel (green arrow).
- Click here to learn about columns.
Resize Tables
To resize a table, select it to show the table handles, then use those handles (the small white boxes at the corners and edges of the selected table, see preceding image) to resize as needed.
Table Headers
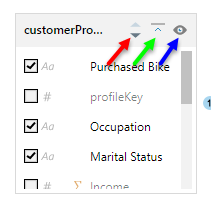
Sort order
Toggle the Sort arrows (orange arrow above) to reverse the order of the Columns in the table.
Virtual Column Calculation
Click the Virtual Columns Calculation button (green arrow) to open the Virtual Column editor, where you can create calculations that derive new columns from values in other columns within a single row. For more information, see Virtual Column Calculations.
Preview
Click Preview (blue arrow) to open a preview of the table in the Preview panel.
Search Columns
Click Search to filter the table to show only those Columns whose names match with your search term. Clicking the Search button opens the Search text field (yellow arrow), where you can type the value that you want to search on. Close the search field (X) to clear your search and show all Columns again.
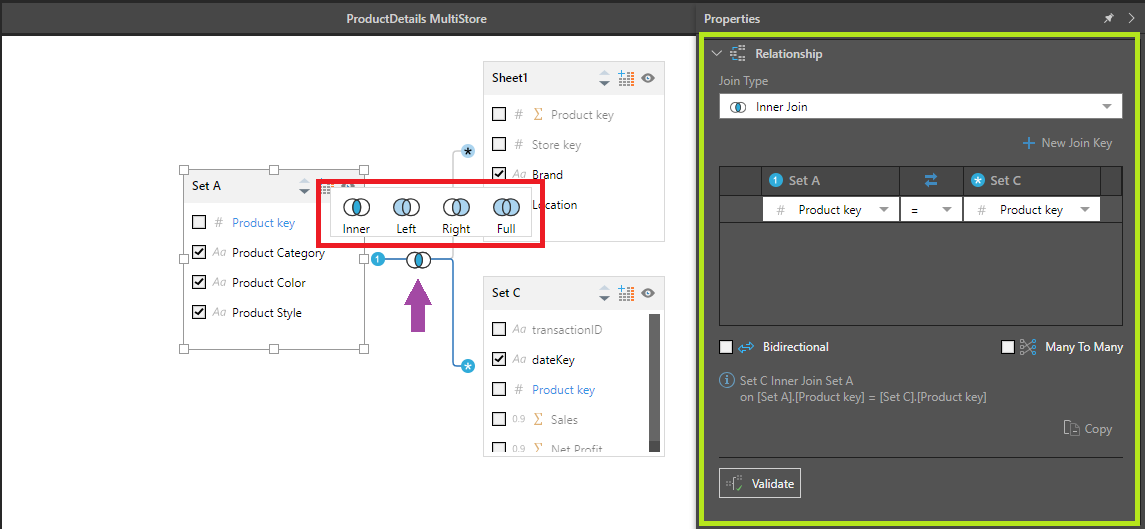
Joins
Click the existing join (purple arrow below) to open both the join type context menu (orange arrow) and the Properties panel (green box). You can change the Join Type from either location and change the Join's properties as needed, updating its columns, deleting it, switching its direction, validating it, and so on.
- Click here to learn more about Joins.